3 Responses so far.
Leave a Comment
http://docs.hortonworks.com/HDPDocuments/Ambari-2.2.0.0/bk_Installing_HDP_AMB/content/_download_the_ambari_repo_lnx6.html
On a server host that has Internet access, use a command line editor to perform the following steps:
root.wget -nv http://public-repo-1.hortonworks.com/ambari/centos6/2.x/updates/2.4.2.0/ambari.repo -O /etc/yum.repos.d/ambari.repo
![[Important]](http://docs.hortonworks.com/HDPDocuments/Ambari-2.2.0.0/bk_Installing_HDP_AMB/common/images/admon/important.png) |
Important |
|---|---|
Do not modify the ambari.repo file name. This file is expected to be available on the Ambari Server host during Agent registration. |
yum repolist
You should see values similar to the following for Ambari repositories in the list.
Version values vary, depending on the installation.
| repo id | repo name | status |
|---|---|---|
| AMBARI.2.2.0.0-2.x | Ambari 2.x | 5 |
| base | CentOS-6 – Base | 6,518 |
| extras | CentOS-6 – Extras | 15 |
| updates | CentOS-6 – Updates | 209 |
yum install ambari-server
y when prompted to to confirm transaction and dependency checks.A successful installation displays output similar to the following:
Installing : postgresql-libs-8.4.20-3.el6_6.x86_64         1/4
Installing : postgresql-8.4.20-3.el6_6.x86_64              2/4
Installing : postgresql-server-8.4.20-3.el6_6.x86_64       3/4
Installing : ambari-server-2.2.0.0-1470.x86_64               4/4
Verifying  : ambari-server-2.2.0.0-1470.x86_64               1/4
Verifying  : postgresql-8.4.20-3.el6_6.x86_64              2/4
Verifying  : postgresql-server-8.4.20-3.el6_6.x86_64       3/4
Verifying  : postgresql-libs-8.4.20-3.el6_6.x86_64         4/4

Installed:
  ambari-server.x86_64 0:2.2.0.0-1470

Dependency Installed:
 postgresql.x86_64 0:8.4.20-3.el6_6
 postgresql-libs.x86_64 0:8.4.20-3.el6_6
 postgresql-server.x86_64 0:8.4.20-3.el6_6
Complete!
![[Note]](http://docs.hortonworks.com/HDPDocuments/Ambari-2.2.0.0/bk_Installing_HDP_AMB/common/images/admon/note.png) |
Note |
|---|---|
| Accept the warning about trusting the Hortonworks GPG Key. That key will be automatically downloaded and used to validate packages from Hortonworks. You will see the following message:
|
|
Note |
|---|---|
| When deploying HDP on a cluster having limited or no Internet access, you should provide access to the bits using an alternative method.
For more information about setting up local repositories, see Using a Local Repository. Ambari Server by default uses an embedded PostgreSQL database. When you install the Ambari Server, the PostgreSQL packages and dependencies must be available for install. These packages are typically available as part of your Operating System repositories. Please confirm you have the appropriate repositories available for the postgresql-server packages. |
Before starting the Ambari Server, you must set up the Ambari Server. Setup configures Ambari to talk to the Ambari database, installs the JDK and allows you to customize the user account the Ambari Server daemon will run as. The ambari-server setup command manages the setup process. Run the following command on the Ambari server host to start the setup process. You may also append Setup Options to the command.
ambari-server setup
Respond to the setup prompt:
y), and continue.root. Accept the default (n) at the Customize user account for ambari-server daemon prompt, to proceed as root. If you want to create a different user to run the Ambari Server, or to assign a previously created user, select y at the Customize user account for ambari-server daemon prompt, then provide a user name. Refer to the Ambari Security Guide > Configuring Ambari for Non-Root, for more information about running the Ambari Server as non-root.iptables you may get a warning. Enter y to continue. |
Note |
|---|---|
| JDK support depends entirely on your choice of HDP Stack versions. Please refer to the Ambari Reference Guideto see which JDK versions are supported by the HDP Stack version you intend to install. By default, Ambari Server setup downloads and installs Oracle JDK 1.8 and the accompanying Java Cryptography Extension (JCE) Policy Files. If you plan to use a different version of the JDK, see Setup Options for more information. |
n at Enter advanced database configuration to use the default, embedded PostgreSQL database for Ambari. The default PostgreSQL database name is ambari. The default user name and password are ambari/bigdata. Otherwise, to use an existing PostgreSQL, MySQL or Oracle database with Ambari, select y.
|
Important |
|---|---|
| You must prepare a non-default database instance, using the steps detailed in Using Non-Default Databases-Ambari, before running setup and entering advanced database configuration. |
|
Important |
|---|---|
| Using the Microsoft SQL Server or SQL Anywhere database options are not supported. |
2.Select the database you want to use and provide any information requested at the prompts, including host name, port, Service Name or SID, user name, and password.3.Select the database you want to use and provide any information requested at the prompts, including host name, port, database name, user name, and password.4.Select the database you want to use and provide any information requested at the prompts, including host name, port, database name, user name, and password.y. |
Note |
|---|---|
| If your host accesses the Internet through a proxy server, you must configure Ambari Server to use this proxy server. See How to Set Up an Internet Proxy Server for Ambari for more information. |
ambari-server start
ambari-server status
ambari-server stop
|
Note |
|---|---|
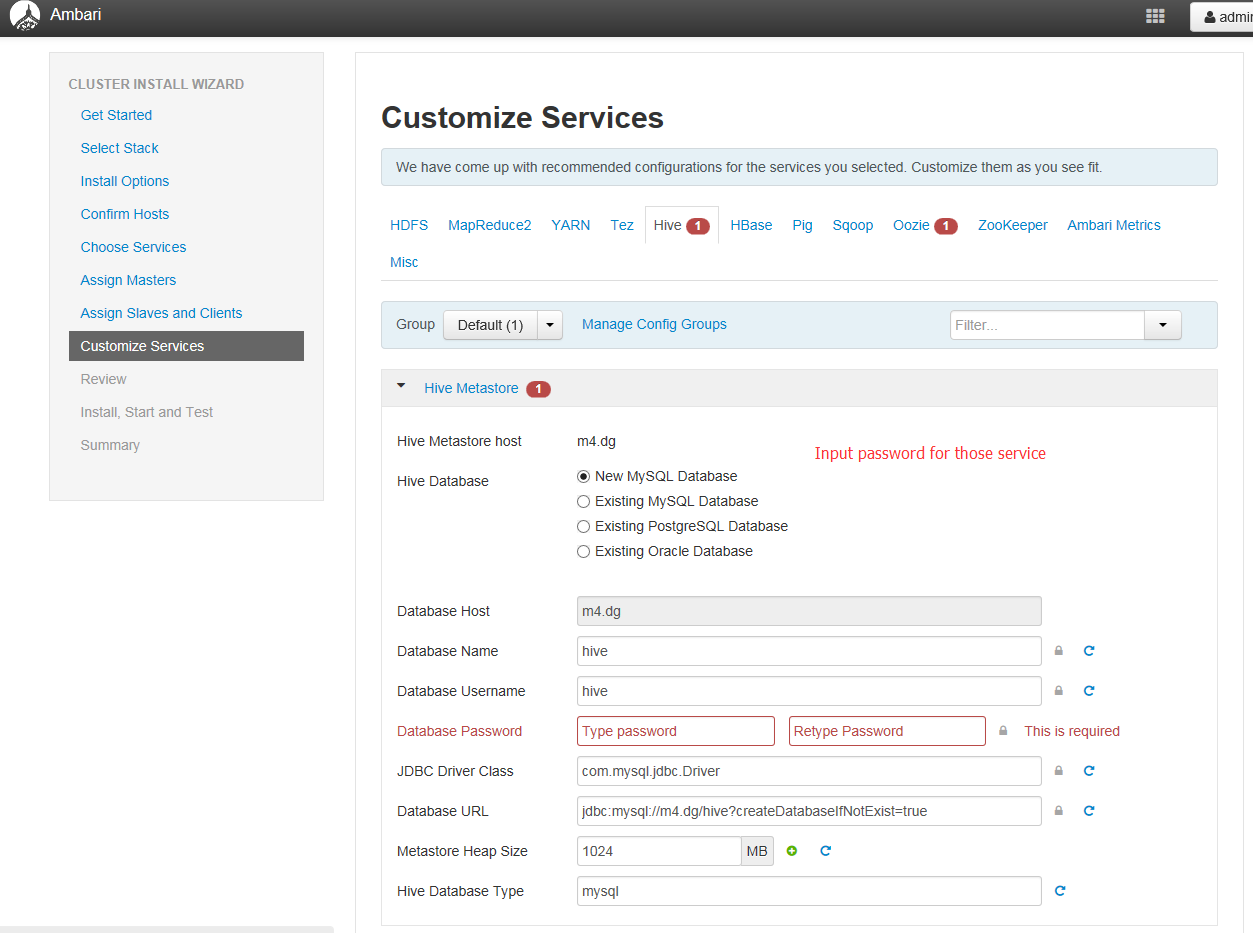
| If you plan to use an existing database instance for Hive or for Oozie, you must complete the preparations described inUsing Non-Default Databases-Hive and Using Non-Default Databases-Ooziebefore installing your Hadoop cluster. |
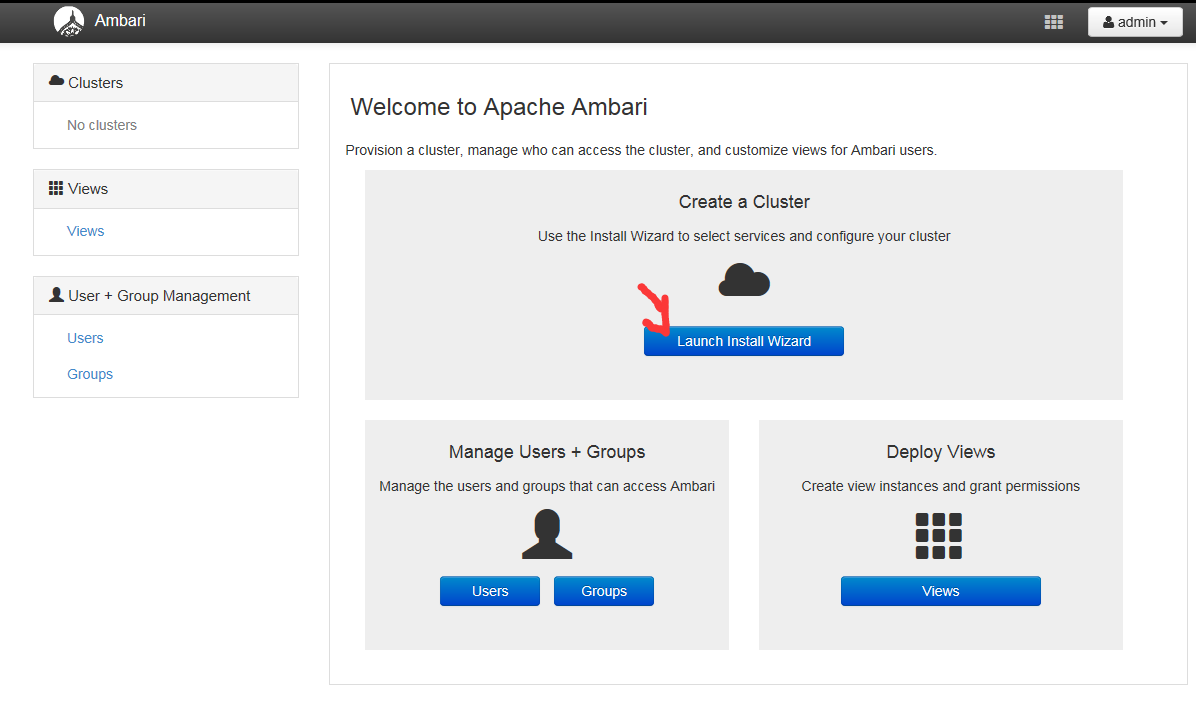
Next Steps

I never found any interesting article like yours. It’s pretty worth enough for
me. In my opinion, if all webmasters and bloggers made good content as you did,
the web will be a lot more useful than ever before.